

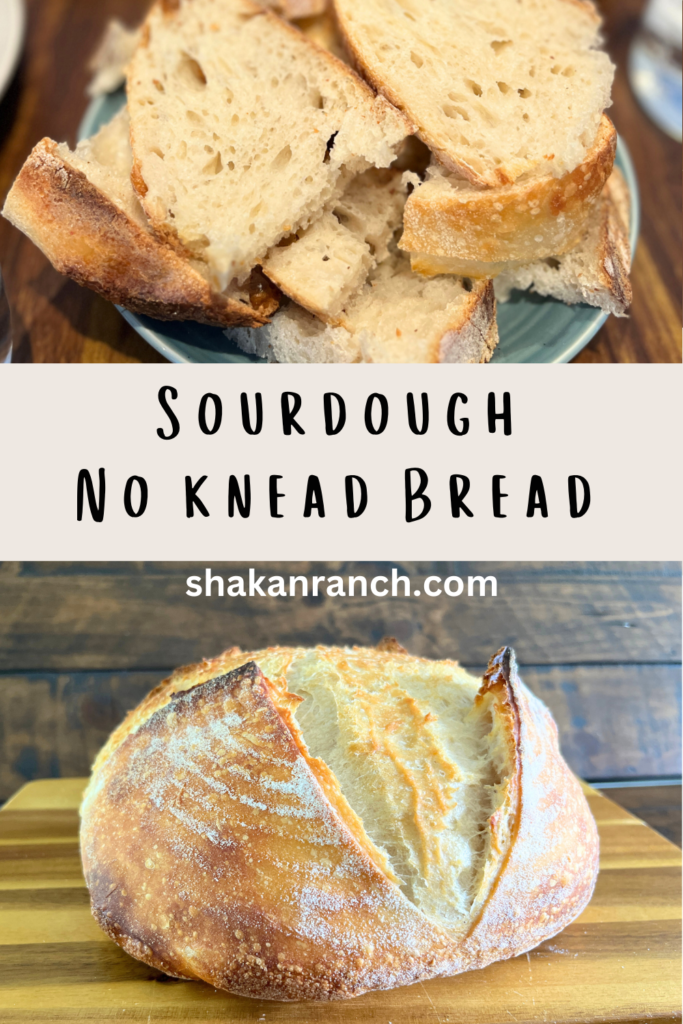
This easy no-knead sourdough bread is perfect if you are new to sourdough or tired of complicated methods. You don’t need special equipment, long kneading sessions, or baking experience to make this bread successfully.
This recipe uses simple ingredients, a relaxed timeline, and a hands-off method that fits real life. If you’ve struggled with dense, flat, or confusing sourdough loaves, this beginner sourdough bread recipe will help you understand the process and bake a loaf you can feel proud of.
This post may contain affiliate or sponsored content.
Easy No-Knead Sourdough Bread for Beginners
Sourdough bread is a timeless classic, loved for its rich flavor and satisfying texture. Traditionally, making sourdough requires kneading and careful attention, which can feel intimidating if you’re just starting out.
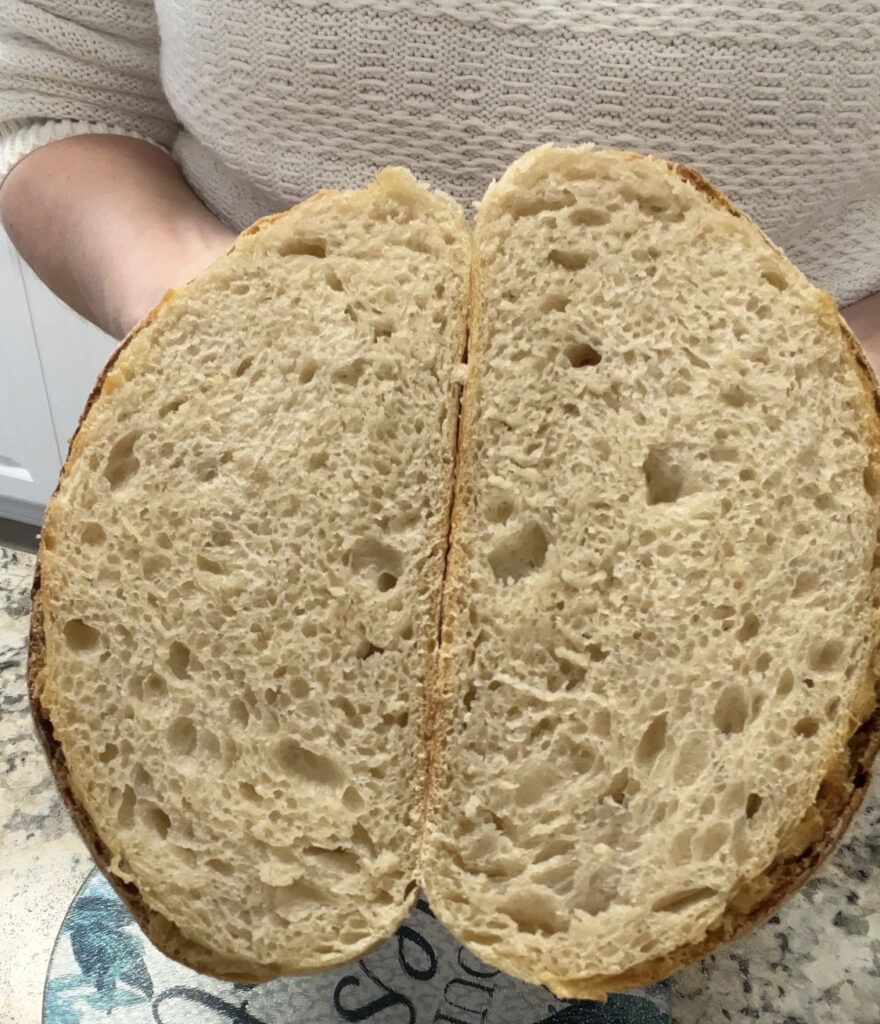
This easy no-knead sourdough bread is perfect for beginners and busy bakers. It uses minimal hands-on effort and a slow, extended fermentation to create a crusty, flavorful loaf with a soft, airy crumb.
Why No-Knead Sourdough is Perfect for Beginners
The no-knead method takes the stress out of bread baking. You don’t need hours of kneading or fancy equipment — just simple ingredients and patience. This method allows the dough to develop naturally over time, giving you beautiful artisan bread without the extra effort.
My Journey to Perfecting Sourdough Bread
When I first started baking sourdough, my loaves often spread out flat like pancakes and couldn’t hold their shape. It took persistence and a lot of trial and error to get it right. Now, I’m thrilled to serve my family this easy no-knead sourdough bread, knowing it’s a healthier, homemade alternative to store-bought bread.
What You’ll Love About This Recipe
- Minimal hands-on effort — perfect for beginners
- Crusty exterior and soft, airy crumb
- Healthy, homemade bread for your family
- Simple ingredients you likely already have in your kitchen
Bread baking is a journey, and I’m still learning new tricks every day. With this recipe, you can enjoy the process and feel confident baking your own artisan bread. Happy baking!
Why Using High-Quality Bread Flour Matters
One of the most important factors for baking successful sourdough bread is the type of flour you use. For this easy no-knead sourdough bread, I recommend high-protein bread flour, like King Arthur Bread Flour.
Bread flour has a higher protein content than all-purpose flour, which helps develop strong gluten. This is essential for a lofty, well-structured loaf. If you use flour with lower protein, like some all-purpose brands, your bread may spread out flat, have a dense crumb, or fail to rise properly.
Using a reliable, high-quality bread flour ensures your dough is easier to work with and gives consistent results, especially for beginners. King Arthur is my go-to because it’s widely available, dependable, and produces a beautiful, airy, crusty sourdough loaf every time.
Pro tip: If you only have all-purpose flour, it may work for some recipes, but your results will likely vary — especially for no-knead sourdough. For best results, stick to bread flour until you’re comfortable with the process.

Why Making Homemade Sourdough Bread is Worth It
Making homemade sourdough bread takes patience and practice, but the results are always worth it. After years of learning and experimenting, I now sell my bread locally and love sharing my favorite easy sourdough bread recipe with others.
This recipe is perfect for beginners, and I hope it helps you bake your own delicious no-knead sourdough bread at home. If you need guidance or have questions, feel free to reach out to me on Facebook Messenger or Instagram — I’m happy to help!
Similar posts you might be interested in:
- Cooking Without Electricity: + Sourdough Bread Baked On Coals
- Sourdough pizza dough recipe
- Sourdough Starter Maintenance
- Sourdough Jalapeño Cheddar Bread Loaf Recipe
- Sourdough Bread Bowls
Tools needed:
- Digital Food Scale
- or Measuring Cups and Measuring Spoons
- Large Mixing Bowl
- Proofing Basket
- Parchment Paper
- Razor Blade
- 5.5 qt Cast iron dutch oven
- Oven Mitts
- Cutting Board
- Sharp Knife
Ingredients (Digital Scale)
- 385 grams water
- 100 grams starter
- 12 grams salt
- 520 grams King Arthur All Purpose Flour
- 2 tbsp raw honey (optional will taste just as good without)
Ingredients (Cups & Spoons)
- 2 cups water
- 1/2 cup starter
- 2 tsp salt
- 4 cups King Arthur All Purpose Flour
- 2 tbsp raw honey (optional will taste just as good without)
Directions:
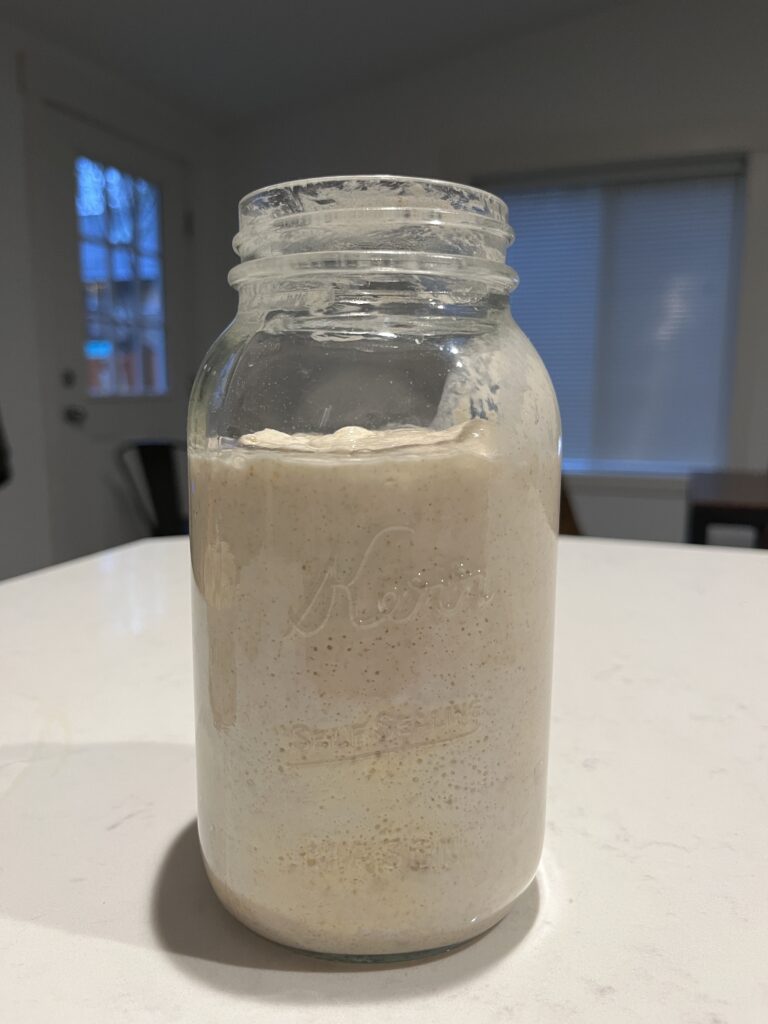
Feed your starter:
- Feed your starter (1 cup flour, 1/2 cup water and 50 grams of starter OR the rest of your starter you had in the fridge) and wait for it to triple (rise and start falling). Watch how I feed my sourdough starter HERE!
Make the dough:
- Measure all of your ingredients water, salt, sourdough starter, and flour.
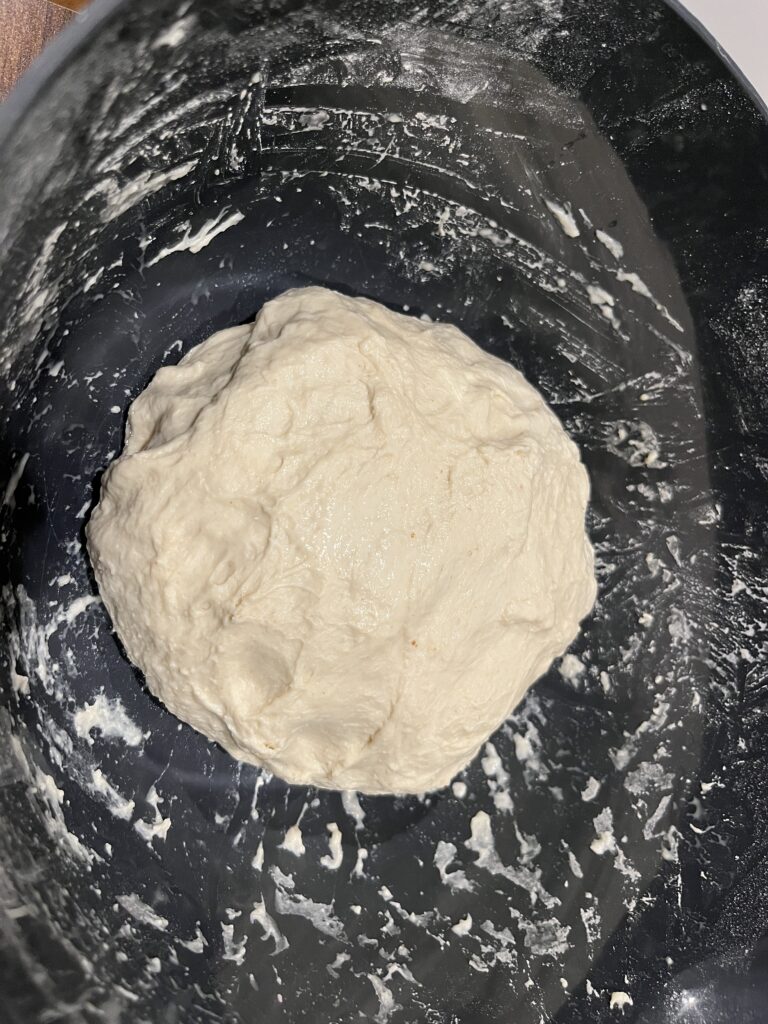
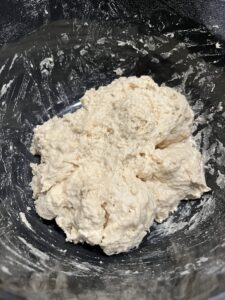
- Mix all of the ingredients together with a wooden spoon, making a shaggy ball of dough. Make sure all of the flour is hydrated and no dry spots left.
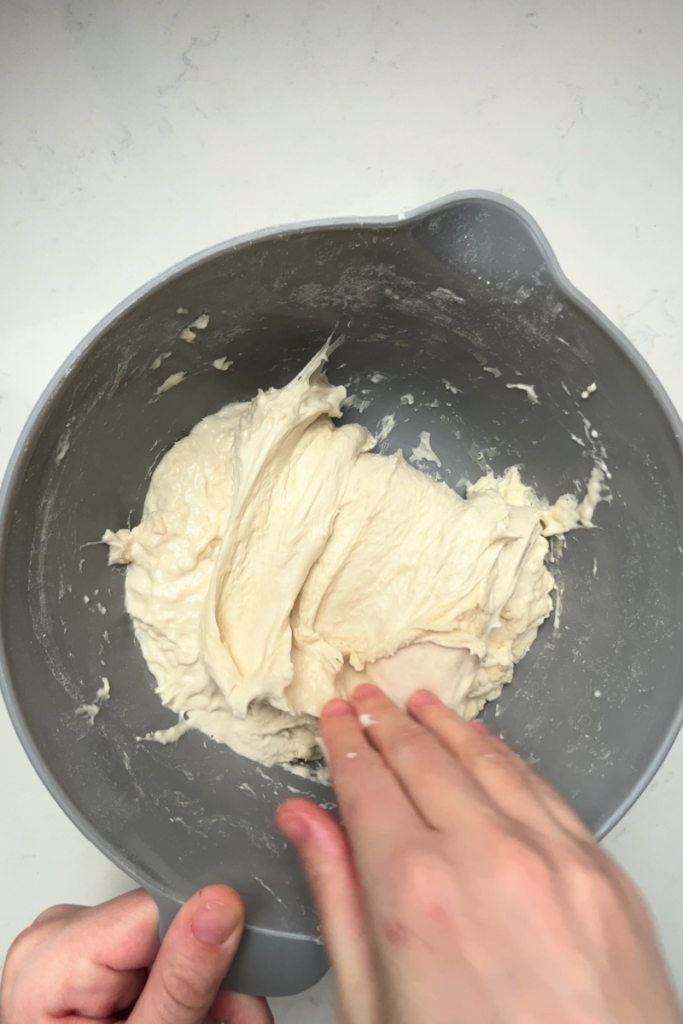
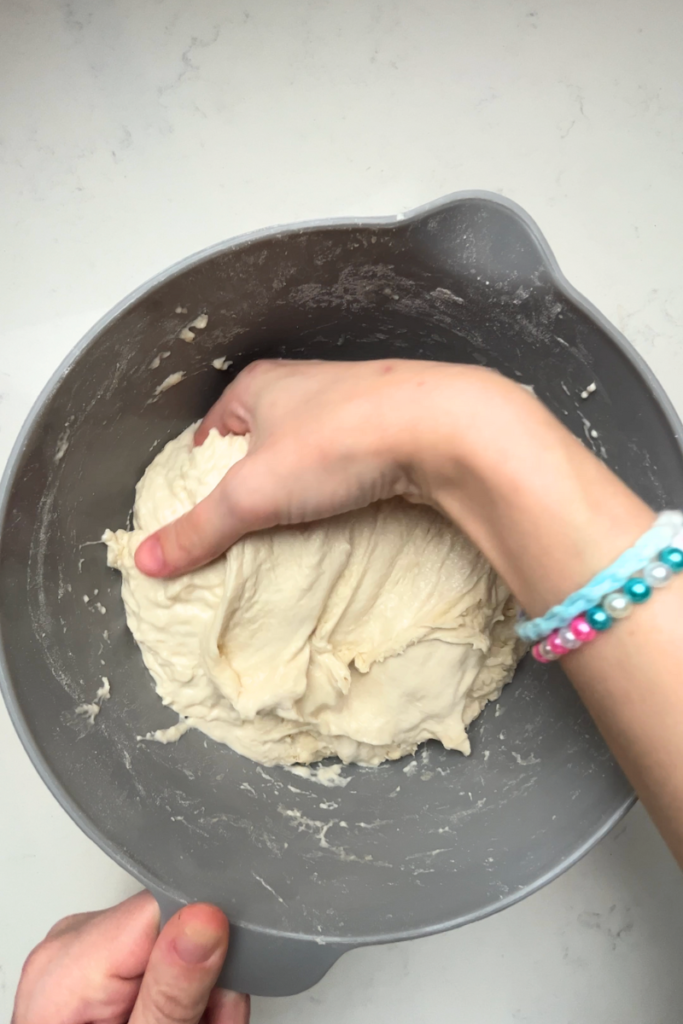
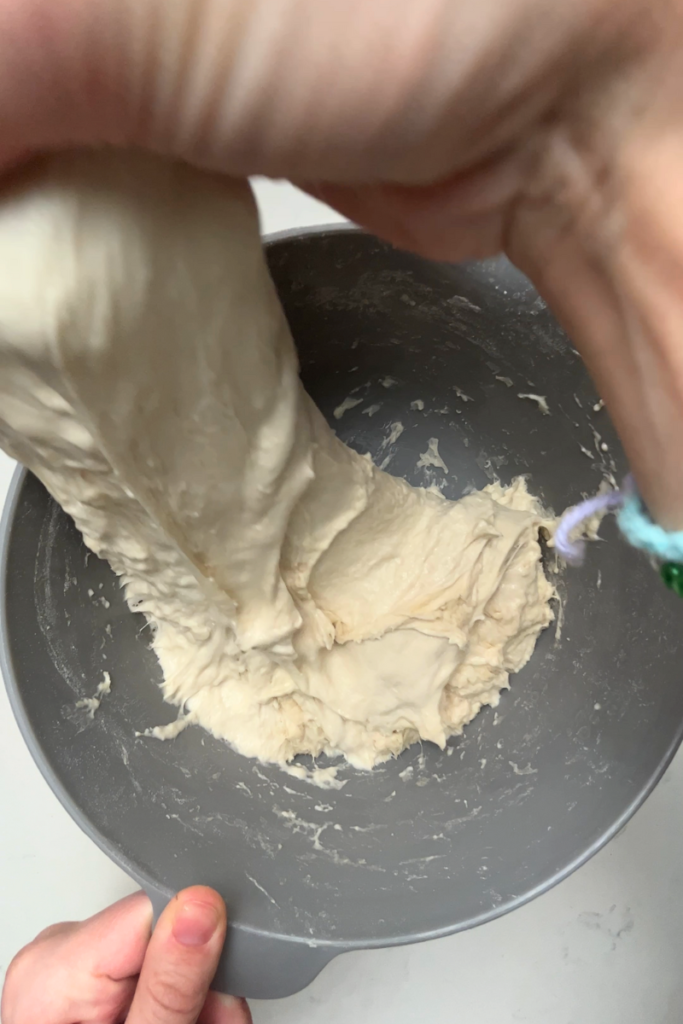
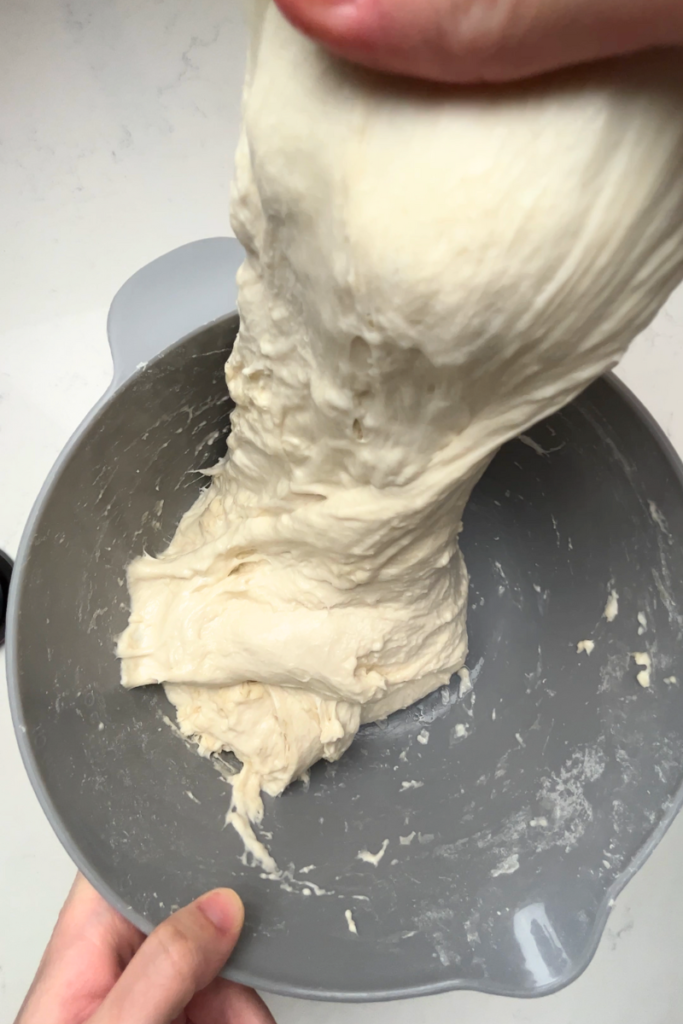
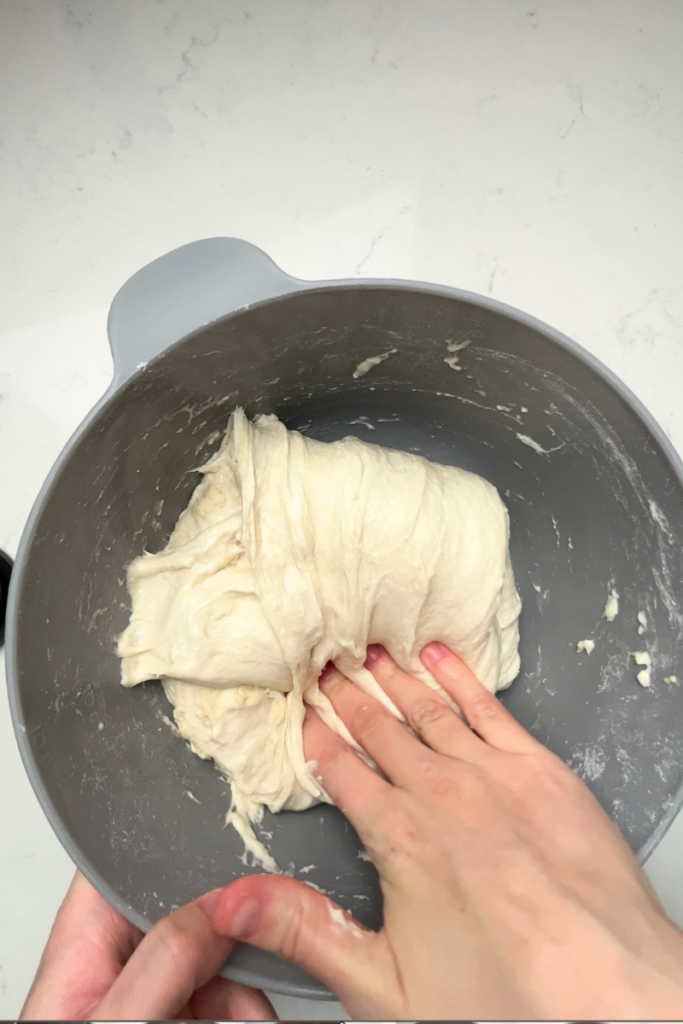
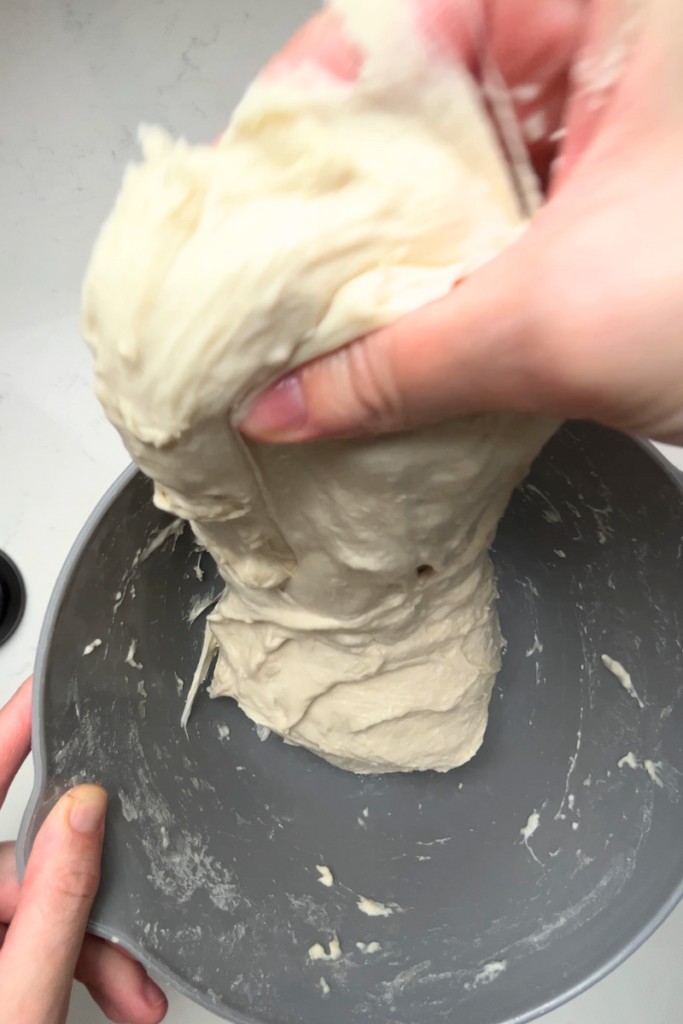
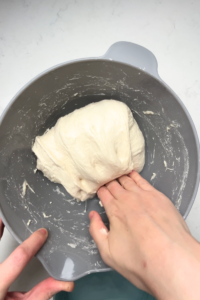
Strengthen the dough (series of “folds” – see pics on bottom of the post):
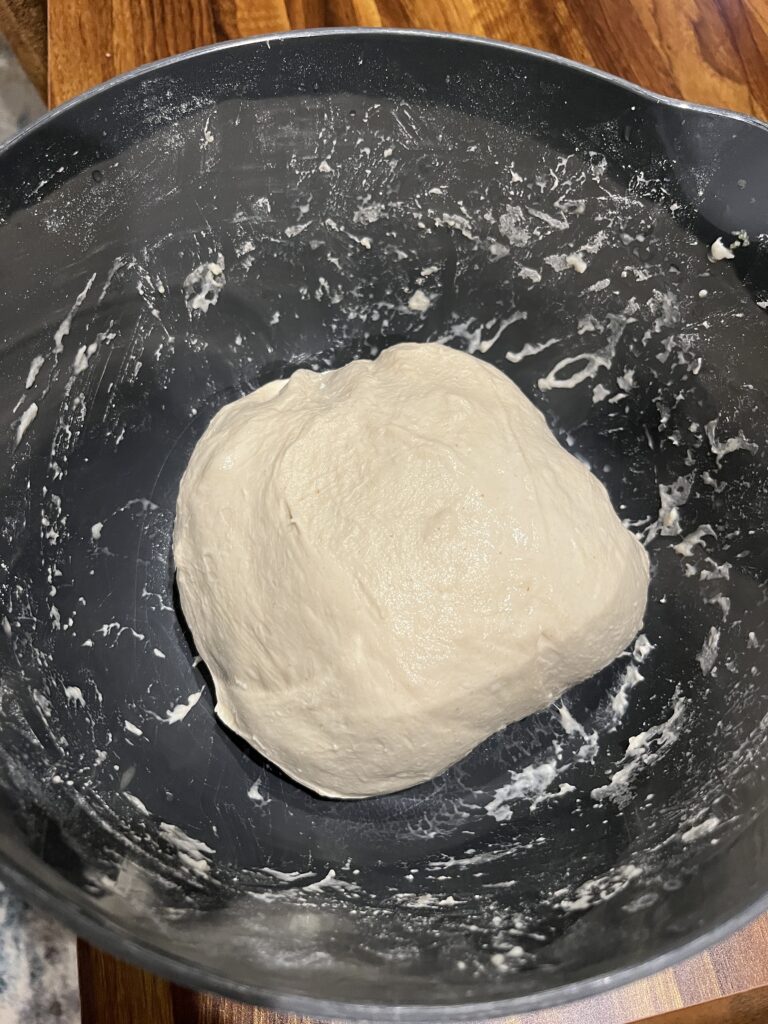
- Gently lift one side of the dough and fold it over the center. Repeat with the other three sides. This helps strengthen the dough without traditional kneading. Repeat this process every 15-30 minutes for the first 2 hours.

Shaggy Dough – 1st stretch and fold
2nd stretch and fold
3rd stretch and fold

Bulk Fermentation:
- Cover the bowl with plastic and let the dough bulk ferment at room temperature for 8-12 hours, or overnight. The longer fermentation enhances flavor. If it’s colder in your house, place the dough on top of your fridge, it’s usually warmer higher up.
Shaping:
- In the morning, gently get the fermented dough out on a clean counter top. Shape the dough into a ball. (see video)
- Tighten the ball by rolling it towards yourself. (see video)
- Dust with rice flour.
- Make sure your proofing basket is dusted well with rice flour as well.
Second Rise:
- Cover the proofing basket and let the dough rise for about 2 hours, or until the dough has reached the rim of the proofing basket.
Freezer:
- Place the dough in the proofing basket into the freezer for 15 mins. This will help and make scoring easier.
Preheat and Bake:
- Preheat your oven to 450°F (230°C) with a Dutch oven inside for about 15 mins.
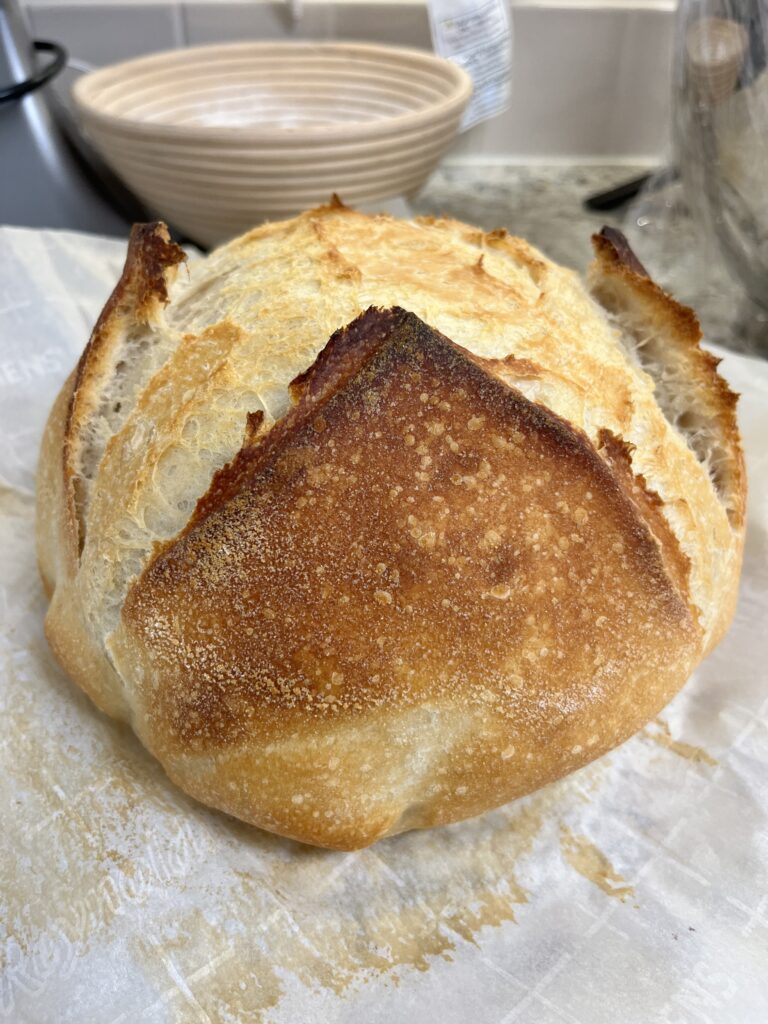
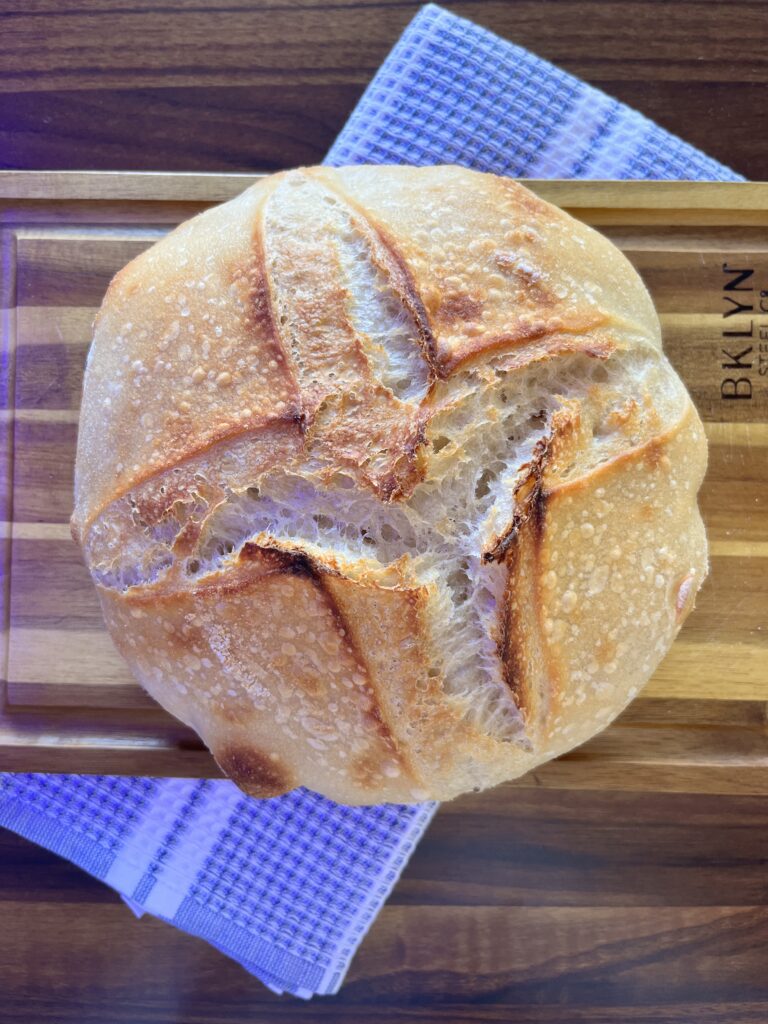
- Flip your dough onto a parchment paper, score, and bake.
- Once preheated, carefully transfer the dough (with parchment paper) into the hot Dutch oven, cover with the lid, drop in a few ice cubes for steam, and bake for 45 minutes with the lid on.
- Remove the lid and bake for 5 more minutes.
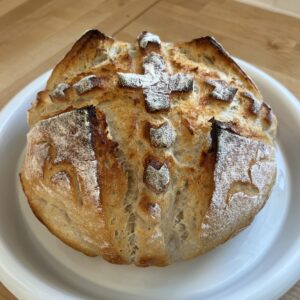
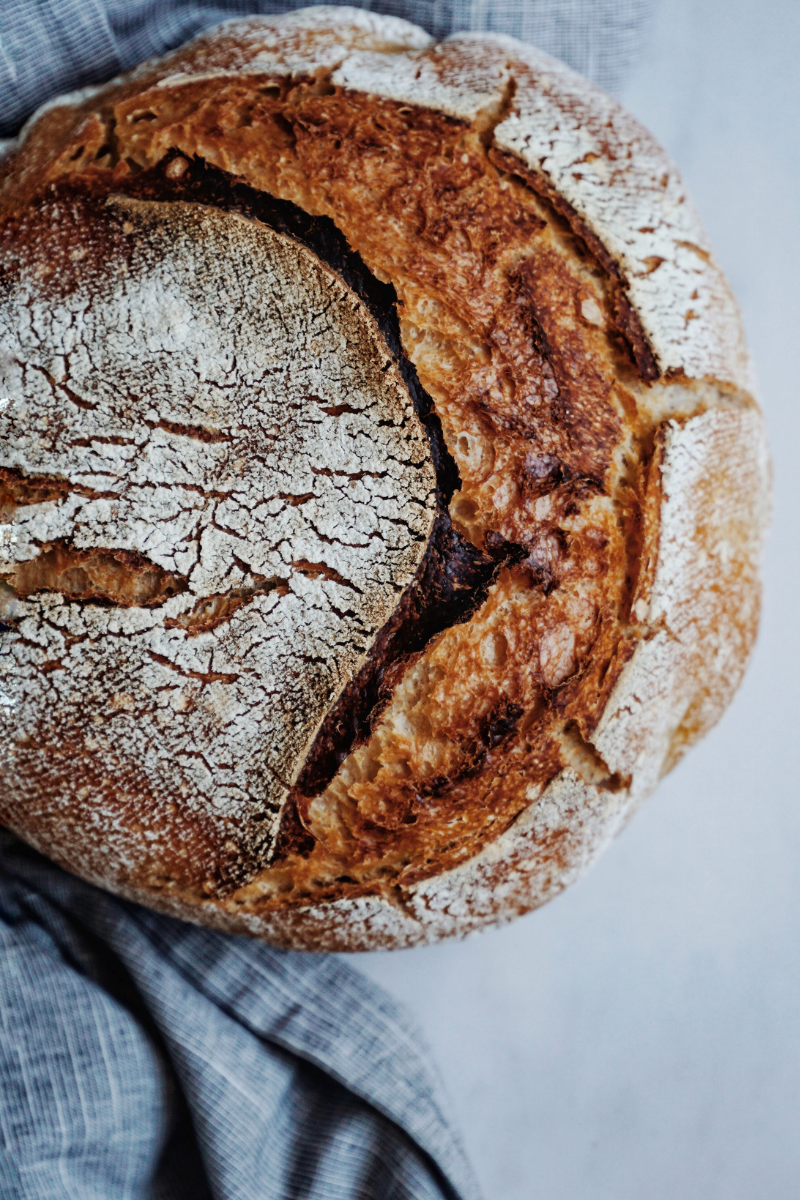
- The bread should be golden and beautiful.


Cooling:
- Allow the bread to cool on a wire rack before slicing. This step is crucial to let the interior finish setting. If you cut in too early it will be gummy and sticky.
Sample Bakers Schedule:
Option 1:
8 AM: Feed your starter in the morning.
7 PM: Mix all ingredients for bread and mix into shaggy ball
7:15 PM: 1st stretch and fold
7:30 PM: 2nd stretch and fold
7:45 PM: 3rd stretch and fold
8:00 PM: 4th stretch and fold (watch video here)
8:15 PM: Bulk ferment overnight
6 AM: Shape
9 AM: Second rise
10 AM: Preheat oven with your Dutch Oven for 450 degrees Fahrenheit
10:30 AM: Bake
Note: Watch this video on how to shape and form for the proofing basket, flip, score, bake.
Option 2 with fridge proofing:
8 PM: Feed your starter
8 AM: Mix all ingredients for bread and mix into shaggy ball
8:15 AM: 1st stretch and fold
8:30 AM: 2nd stretch and fold
8:45 AM: 3rd stretch and fold
9:00 AM: 4th stretch and fold (watch video here)
9:15 AM: Bulk ferment all day
7 PM: Shape
7: 15 PM: Second rise
9 PM: Fridge proof (place the proofing basket with the dough into the fridge for overnight)
8 AM: Score and Bake
Note: Fridge proofing options is easier to score and handle since the dough is cold and firm.
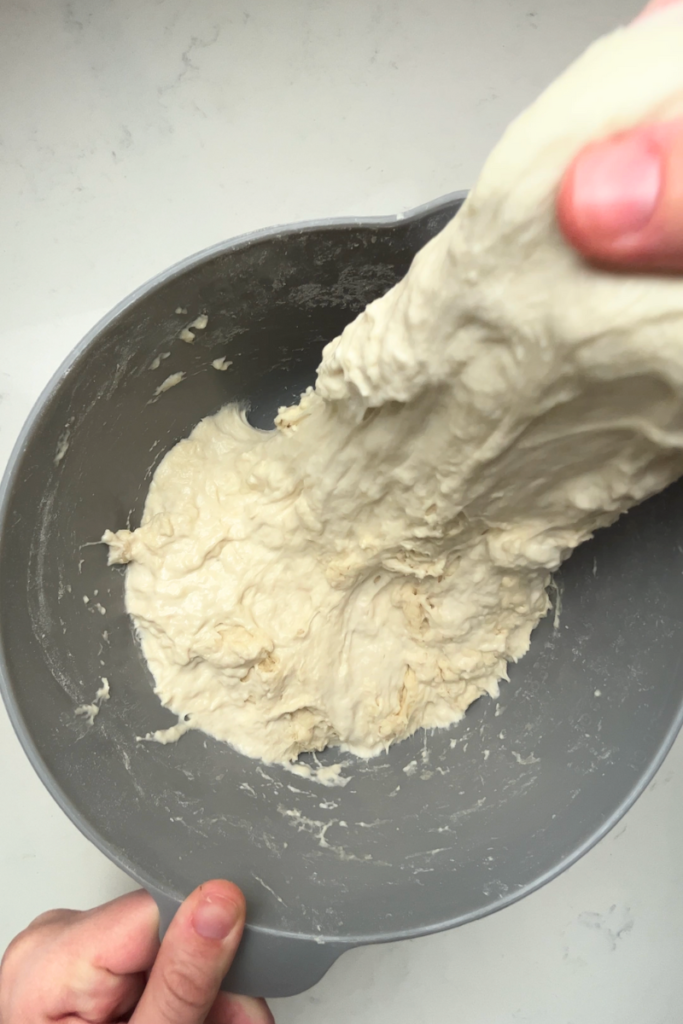
How to do stretch and folds:
Using wet hands, gently lift one side of the rested sourdough dough, stretching it upwards without tearing, and then fold it over the middle. Repeat this process for the remaining three sides, creating a folded envelope shape.
By the 3rd and 4th stretch and fold, the dough should be very elastic and strong. You shouldn’t have to wet your hands as much, since the dough will be a lot less sticky.


Pin this for later:
Sourdough Bread FAQ for Beginners
Q: Why isn’t my sourdough bread rising?
A: Most often, this is due to a weak or inactive starter. Make sure your starter is bubbly, doubled in size, and passes the float test before baking. Temperature also matters — if your kitchen is cold, fermentation will take longer.
Q: Why does my bread turn out flat?
A: Flat bread is usually caused by over-fermentation, under-fermentation, or using flour with too low protein. Make sure to follow the bulk fermentation times and use high-protein bread flour like King Arthur for the best results.
Q: Can I use all-purpose flour instead of bread flour?
A: You can, but results may vary. Bread flour develops more gluten, giving your loaf a better structure and airy crumb. If you use all-purpose, expect a slightly denser loaf.
Q: Can I let my dough ferment overnight?
A: Yes! Overnight fermentation works well and develops flavor. For best results, ferment in a cooler spot if your kitchen is warm, or refrigerate for fridge-proofing.
Q: How do I know when my starter is ready?
A: Your starter is ready when it’s bubbly, has doubled (or tripled) in size after feeding, and floats on water. This ensures your dough will rise properly.
Q: How do I score my bread?
A: Use a sharp razor or lame to make quick, shallow cuts on the surface. This helps the bread expand during baking and creates the classic sourdough pattern.
EASY NO KNEAD SOURDOUGH BREAD RECIPE – BEGINNERS RECIPE
Ingredients
Grams
- 385 grams water
- 100 grams ripe starter
- 12 grams sea salt
- 520 grams King Arthur Bread Flour or KA All Purpose Flour
- 2 tbsp raw honey optional
Cups
- 2 cups water
- 1/2 cup ripe starter
- 2 tsp salt
- 4 cups King Arthur Bread Flour or KA All Purpose Flour
- 2 tbsp raw honey optional
Instructions
Make the dough:
- Measure all of your ingredients water, salt, sourdough starter, and flour.

- Mix all of the ingredients together with a wooden spoon, making a shaggy ball of dough. Make sure all of the flour is hydrated and no dry spots left.
Strengthen the dough (series of "folds"):
- Gently lift one side of the dough and fold it over the center. Repeat with the other three sides. This helps strengthen the dough without traditional kneading. Repeat this process every 15-30 minutes for the first 2 hours.

Bulk Fermentation:
- Cover the bowl with plastic and let the dough bulk ferment at room temperature for 8-12 hours, or overnight. The longer fermentation enhances flavor. If it’s colder in your house, place the dough on top of your fridge, it’s usually warmer higher up.
Shaping:
- In the morning, gently get the fermented dough out on a clean counter top. Shape the dough into a ball. (see pics)
- Tighten the ball by rolling it towards yourself. (see pics)
- Dust with rice flour.
- Make sure your proofing basket is dusted well with rice flour as well.
Second Rise:
- Cover the proofing basket and let the dough rise for about 2 hours, or until the dough has reached the rim of the proofing basket.
Freezer:
- Place the dough in the proofing basket into the freezer for 15 mins. This will help and make scoring easier.
Preheat and Bake:
- Preheat your oven to 450°F (230°C) with a Dutch oven inside for about 15 mins.
- Flip your dough onto a parchment paper, score, and bake.
- Once preheated, carefully transfer the dough (with parchment paper) into the hot Dutch oven, cover with the lid, drop in a few ice cubes for steam, and bake for 45 minutes with the lid on.
- Remove the lid and bake for 5 more minutes.
- The bread should be golden and beautiful.

Cooling:
- Allow the bread to cool on a wire rack before slicing. This step is crucial to let the interior finish setting. If you cut in too early it will be gummy and sticky.
Notes
Sample Bakers Schedule:
Option 1:
8 AM: Feed your starter in the morning. 7 PM: Mix all ingredients for bread and mix into shaggy ball 7:15 PM: 1st stretch and fold 7:30 PM: 2nd stretch and fold 7:45 PM: 3rd stretch and fold 8:00 PM: 4th stretch and fold (watch video here) 8:15 PM: Bulk ferment overnight 6 AM: Shape 9 AM: Second rise 10 AM: Preheat oven with your Dutch Oven for 450 degrees Fahrenheit 10:30 AM: Bake Note: Watch this video on how to shape and form for the proofing basket, flip, score, bake.Option 2 with fridge proofing:
8 PM: Feed your starter 8 AM: Mix all ingredients for bread and mix into shaggy ball 8:15 AM: 1st stretch and fold 8:30 AM: 2nd stretch and fold 8:45 AM: 3rd stretch and fold 9:00 AM: 4th stretch and fold (watch video here) 9:15 AM: Bulk ferment all day 7 PM: Shape 7: 15 PM: Second rise 9 PM: Fridge proof (place the proofing basket with the dough into the fridge for overnight) 8 AM: Score and Bake Note: Fridge proofing options is easier to score and handle since the dough is cold and firm.If you tried this recipe and love it, please come back and give it a review or a comment. Tag me on IG @shakanranch


Leave a Reply