

When you move off grid, setting up a solar system is a MUST! In this blog post we will share our off grid solar system, where we got everything, and why we chose this exact set up.
DISCLAIMER: We are not experts, we are sharing our off grid solar system set up, and the process. We are not able to give any advice.
Posts may contain affiliate links.
Assess Your Energy Needs
Before setting up an off-grid solar system, you need to assess your energy needs. This involves calculating the amount of power your appliances and devices consume. Once you have an estimate of your energy needs, you can determine the size of the solar system you need.
Think about what your needs/wants are, for example we wanted minimal energy to use mainly for lights, fridge, and charging our technology. We don’t need to run an instant pot or a crock pot for a constant 12 hours. Thankfully one of our neighbors does solar set up, so we would spend hours picking their brain and talking about different ways and options for our case. They were always super patient with us and our questions. This set up is not big enough to run a large home, we only have a tiny house for now and went with the most minimal power. We have designed our solar system so that if we decided to add on later, all of our components are designed to be able to do that. Other solar system set up don’t always have this amazing option.
Choose the Right Solar Panels
This website talks about how to choose the right panels.
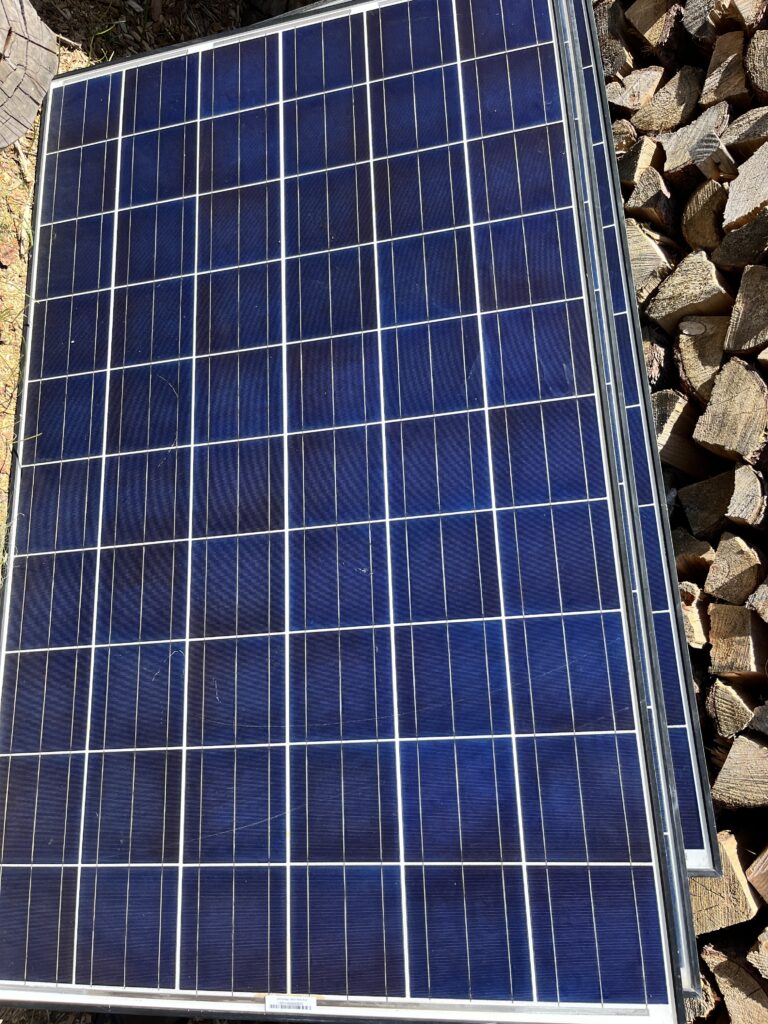
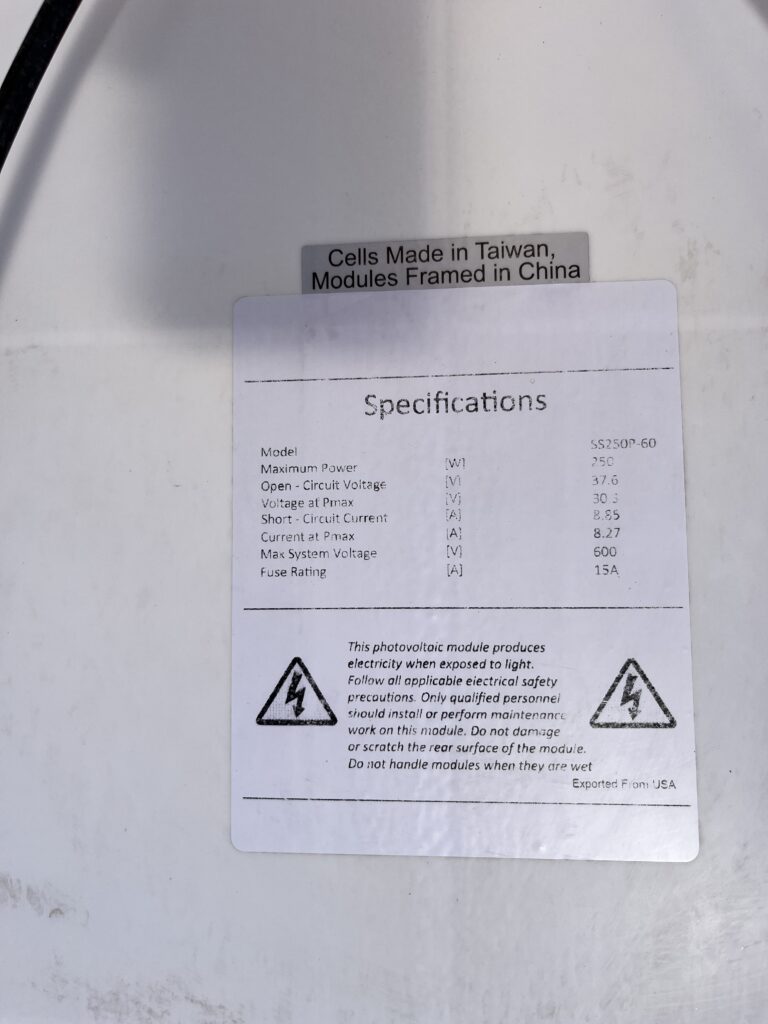
When choosing solar panels for your off-grid solar system, it’s important to consider the efficiency, durability, and cost of the panels. The most common types of solar panels are monocrystalline and polycrystalline (aka multicrystalline).
For now, we have 3 polycrystalline panels of 250 watts each for a total of 750 watts. Stay tuned for a cheap DIY solar array blog post.
Select the Right Inverter
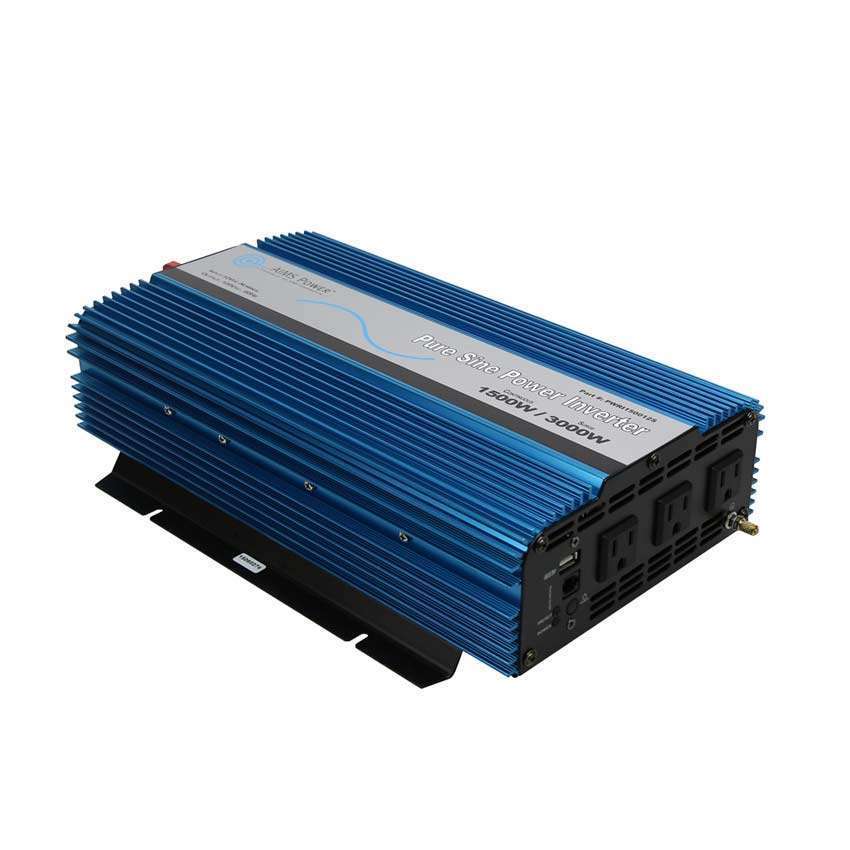
An inverter is a critical component of your off-grid solar system as it converts DC power from the solar panels into AC power that can be used by your appliances and devices. When choosing an inverter, you need to consider its capacity, efficiency, and waveform. Pure sine wave inverters are the most efficient and produce a cleaner waveform than modified sine wave inverters. You also need to ensure the inverter can handle the wattage and voltage of your solar panel array. The inverter should be installed in a cool, dry location that is easily accessible.
We have the 1500 Watt Pure Sine Inverter 48 VDC to 120VAC.
Select the charge controller
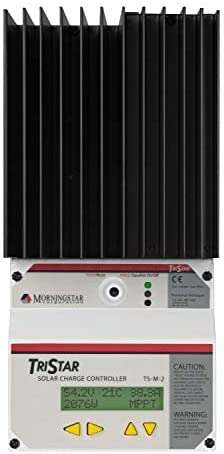
A charge controller is an essential component in a solar power system. Its main function is to regulate the flow of electrical energy between the solar panels and the battery bank. The charge controller ensures that the batteries receive the appropriate amount of charge while preventing overcharging or damage to the batteries. This is the charge controller we have.
Install the Solar Panels
Once you have selected the right solar panels it’s time to install them. Solar panels should be installed in a location that receives maximum sunlight throughout the day. The panels should be tilted at an angle that maximizes their exposure to the sun.
Install the Batteries
Batteries are an essential component of your off-grid solar system as they store excess energy generated by your solar panel array. When selecting batteries, you need to consider their capacity, voltage, and type. Lead-acid batteries are the most common type used in off-grid solar systems, but they require regular maintenance. Lithium-ion batteries are more expensive but require less maintenance and have a longer lifespan. We went with the more expensive upfront cost and purchased 16 Docan Power EVE LF160 160Ah 3.2V LiFePO4 Prismatic Battery Cell Laser Welded Terminal Stud E160 for $99 each. Our neighbor did most of the work on the batteries for us, including testing them.
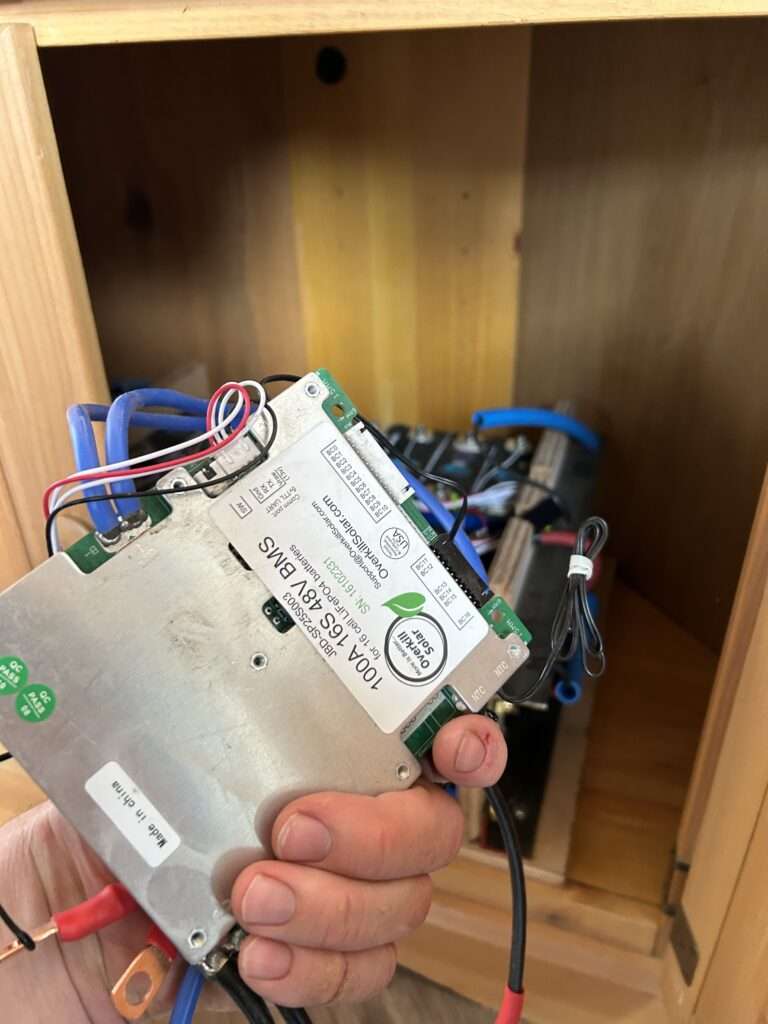
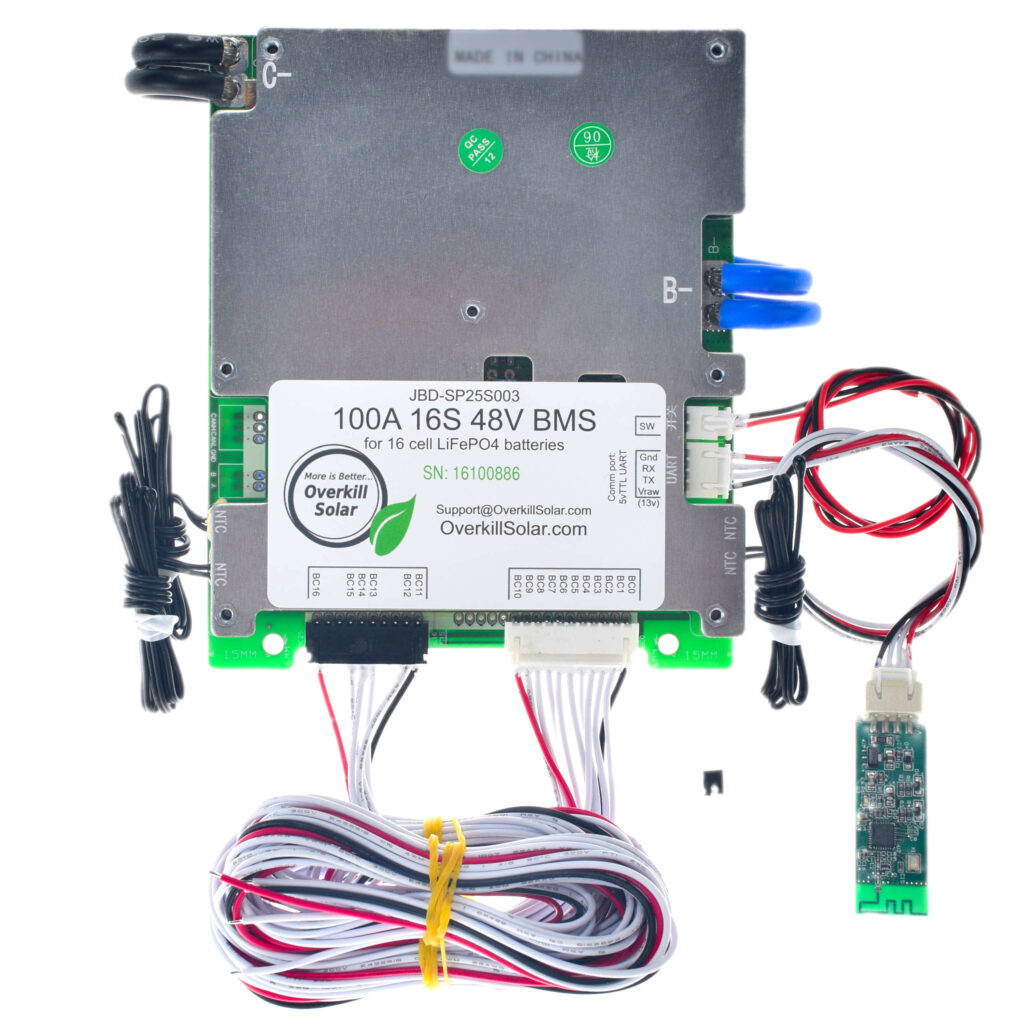
Battery Management System (BMS):
It is a critical component in a solar system set up.
A Battery Management System is responsible for monitoring and controlling the operation of a battery pack. Its primary function is to ensure the optimal performance, safety, and lifespan of the batteries. The BMS typically consists of hardware and software components that work together to manage the charging and discharging of the batteries.
Here are some key functions of a BMS:
- Cell monitoring: The BMS continuously monitors the individual cells within a battery pack, measuring parameters such as voltage, temperature, and current. This information helps in assessing the state of each cell and identifying any potential issues or imbalances.
- State of charge (SOC) estimation: The BMS uses various algorithms and models to estimate the state of charge of the battery pack. SOC refers to the amount of energy stored in the battery at a given time and is crucial for managing battery usage and predicting remaining capacity.
- Balancing: In multi-cell battery packs, the BMS ensures that each cell is charged and discharged evenly. It can perform cell balancing operations to equalize the charge levels among cells, which helps in maximizing the overall capacity and lifespan of the battery pack.
- Thermal management: The BMS monitors the temperature of the battery pack and prevents it from operating outside the safe temperature range. It can activate cooling or heating systems as necessary to maintain optimal temperature conditions.
- Overvoltage and undervoltage protection: The BMS safeguards the battery pack by monitoring voltage levels. It prevents overcharging, which can damage the batteries, as well as undervoltage conditions that could lead to a loss of capacity or potential cell damage.
- Communication and data logging: The BMS facilitates communication between the battery pack and the external systems, such as the solar power system or electric vehicle controller. It also logs data related to battery performance, allowing for analysis and diagnostics.
Overall, the Battery Management System plays a crucial role in optimizing the performance, safety, and longevity of battery packs used in solar systems.
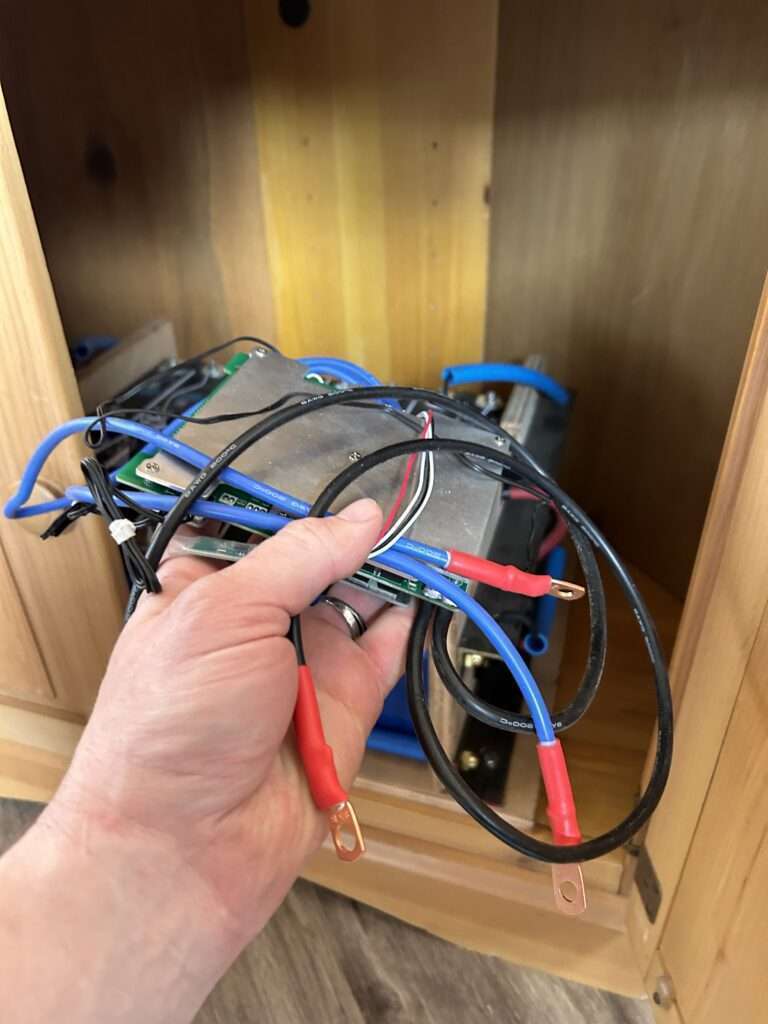
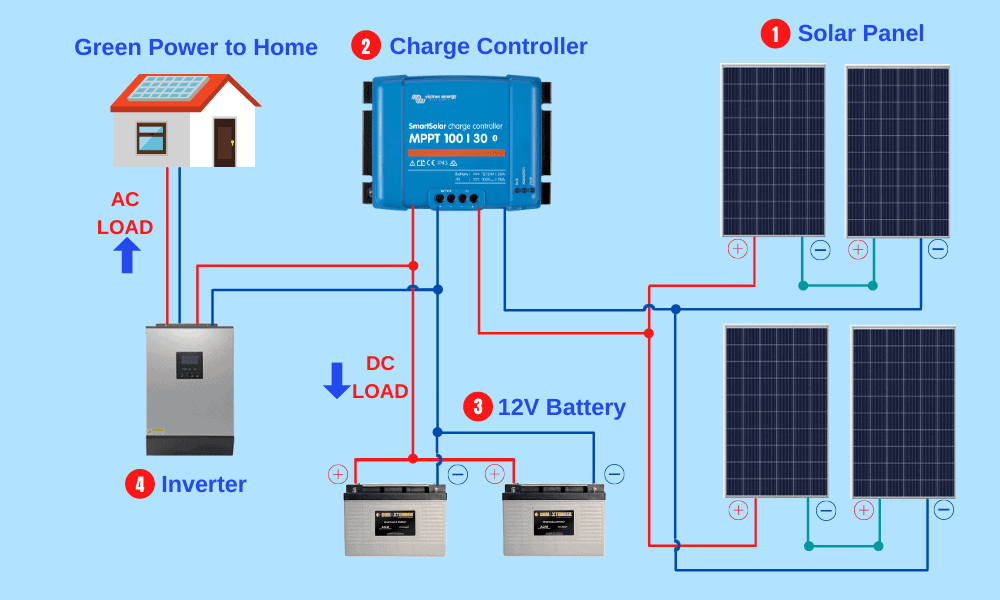
Connect the Components
Once you have installed the solar panels, inverter, and batteries, you need to connect them. This involves connecting the solar panels to the charge controller, which regulates the amount of power that is sent to the batteries. The batteries are then connected to the inverter, which converts the DC power from the batteries into AC power that can be used by your appliances and devices.
Test Your Off-Grid Solar System
After installing and connecting all the components of your off-grid solar system, it’s time to test it. You can do this by turning on your appliances and devices and ensuring they receive power from the solar system. You should also monitor the performance of your solar panels, batteries, and inverter to ensure they are functioning properly.
Other parts and pieces needed for a solar set up
- Blue Sea Systems 7185 285-Series Circuit Breaker, Surface Mount, 70A
- Blue Sea Systems Class T Fuses
- Blue Sea Systems Class T Fuse Blocks
- Photovoltaic Combiner Enclosure
- (2) 10 ft. 12-Gauge Half Slotted Metal Framing Strut Channel in Gold Galvanized
- Plywood to build the battery box
- Thick angle iron
- 3/8 all thread
- Pex
- 3/8 acorn nuts
How much did we spend on our solar system set up?
We have spent around $3360 for everything we purchased for this solar set up. This of course does not include the cost of hiring someone to set it all up for you. Thankfully, we had our friend to help us through this process and guide us. We will most likely be setting it up ourself, with him by our side 🙂 It’s not fully set up yet, we have been slowly purchasing this overtime.
- $1600.00 Batteries
- $340.00 Inverter
- $150 Miscellaneous
- $800 Charge Controller
- $300 Solar Panels
- $170 BMS
If we didn’t have a solar friend, we most likely would have purchased a Bluettii power system.
Why did we choose this solar system set up?
- Expandable, like I mentioned above this system is great for adding on to if you ever need to upgrade. You can get more panels and do a second battery bank, connect then all, and you will have double of this set up. Add on as needed or as you can afford.
- Longer life span. This set up compares to Bluetti but has more power, more efficient, and a longer life span. It’s a bit more expensive than the Bluettii but has a lot more pros.
- Won’t damage the batteries. If you ever run the batteries low, it won’t hurt them. They will shut off automatically if they get too cold, and will not destroy the batteries.
Conclusion
Setting up an off-grid solar system requires careful planning and consideration. It is not a one day project so prepare by using a generator (this super quiet, push to start 3500 generator is our favorite) before you have the solar all set up. This is our set up and steps we took in getting our solar system.
Similar posts you may like:
- 5 Reasons to Live Off Grid
- Up Front Investments For Off Grid Life – Food, Shelter, Water
- Stay connected off grid – Community is important
- 3 Things NOT To Do When Your In Debt and Moving Off Grid


Leave a Reply