
If you’ve ever wanted to bake sourdough bread but felt overwhelmed by making a starter, this easy 3-tablespoon method is perfect for you!
A sourdough starter is a natural leavening agent made by fermenting flour and water, capturing wild yeast to help your bread rise without commercial yeast. Unlike traditional methods that require large amounts of flour and water, this low-waste approach keeps things simple.
In just a few minutes a day, you’ll create a strong, bubbly starter ready for baking in about a week. Follow this step-by-step guide to start your sourdough journey with confidence—no experience needed!
Disclaimer: I would highly recommend to buy a local mature starter, but if you really want to make your own, this 3 tbsp method is my favorite!
Similar posts you may like:
- Sourdough Starter Maintenance
- Sourdough Starter FAQs, Tips, and Tricks
- Benefits of Sourdough Bread
- Easy Sourdough Chocolate Chip Cookies
What Is a Sourdough Starter?
A sourdough starter is a natural leavening agent made by fermenting flour and water. It captures wild yeast and bacteria from the environment, helping your bread rise without the need for commercial yeast. Once established, a sourdough starter can last indefinitely with regular feedings.
Why use the 3 tbsp method to make your own sourdough starter?
Many traditional sourdough starter recipes call for large amounts of flour and water, leading to a lot of waste. This 3-tablespoon method minimizes waste while still creating a strong, healthy starter. It’s perfect for beginners or anyone who wants a simple, low-maintenance way to get started.
- Simplicity: The 3 tbsp method is straightforward and easy to remember. Very convenient and simple.
- Small quantities: By using 3 tablespoons of flour, you’re working with smaller amounts of ingredients. This can be beneficial if you’re starting out and don’t want to use large quantities of flour and a lot of discard.
- Less Discard: This method will not have any discard for the first 3 days. After day 3, you might have discard. Once you start making bread like this Easy No Knead Sourdough Bread Recipe – Beginners Recipe I never have any extra discard that I have to dump out. I always mix enough for two loaves, make the bread, and feed the starter for my next loaves.
- Quick results: Working with smaller amounts in the beginning allows you to observe any changes and progress more easily. With a smaller starter, you may notice signs of fermentation and activity sooner, giving you quicker result on the success of your very own starter.
Ingredients:
- 3 tablespoons (45 grams) all-purpose flour or bread flour (I use King Arthur)
- 3 tablespoons water (not every feed -keep reading)
Equipment:
- Clean small 2 cup mason glass jar (You will need a bigger jar once you have a successful starter!) *Make sure it’s wide mouth or else it’s harder to clean.
- Utensil (wooden spoon or silicone spatula)
- Plastic wrap
NOTE: I don’t add 3 tbsp of water every feed. I always add 3 tbsp of flour and if the mixture is super runny I wont add any water. If the mixture is more of a thicker consistency, I will add 1 tbsp at a time. The consistency should be like sour cream.
Watch how I make it:

First Feed – Evening
- 7 PM: In a clean bowl combine 3 tablespoons and 3 tablespoons of water.
- Mix well into a smooth, slightly thick mixture, consistency should be like sour cream.
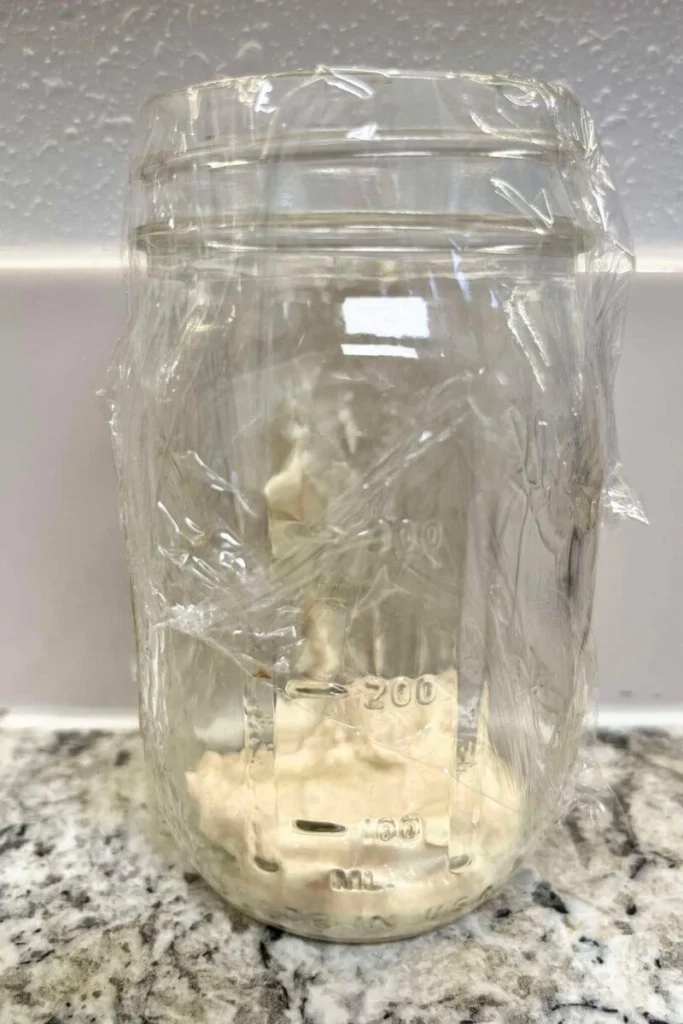
- Place into the mason jar.
- Loosely cover the plastic wrap, allowing air to circulate but preventing any debris from entering.
- Place the jar in a warm location, ideally between 70°F to 85°F (21°C to 29°C). On your counter would work, on top of your fridge, or in your oven with the light on.
- Leave it overnight.
2nd Feed – Morning
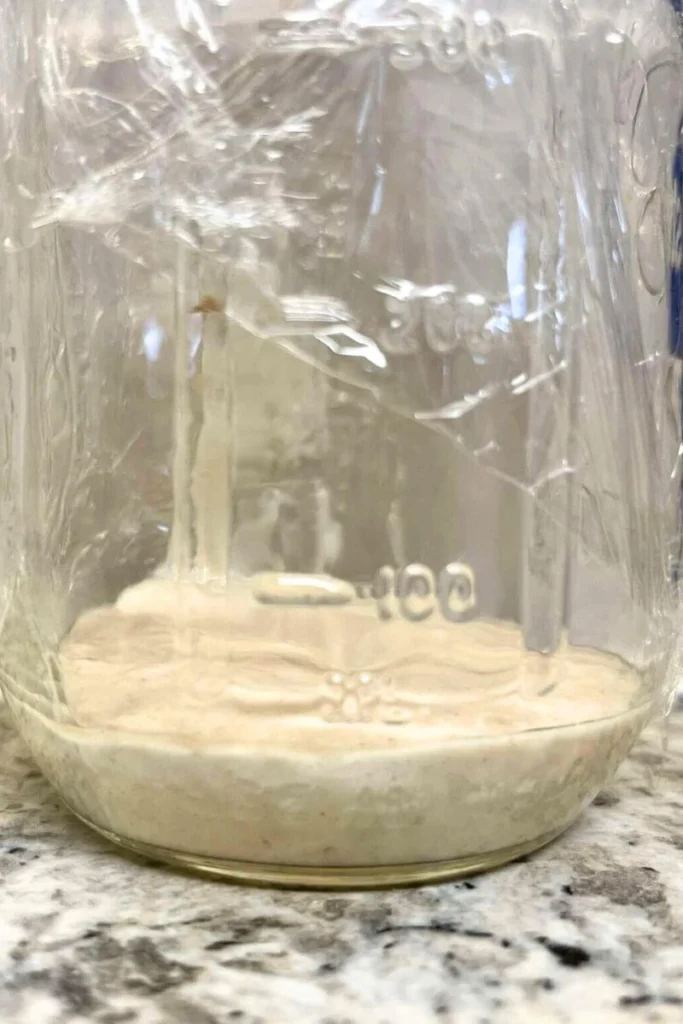
- 8 am: Check the jar for any signs of activity. It’s normal if there aren’t any significant changes at this stage. I saw a little bit on bubble.
- In a clean bowl mix 3 tablespoons all-purpose flour and 3 tablespoons of water and the mixture from last night
- Stir the ingredients until well combined.
- Place everything back into the jar.
- Loosely cover the jar and return it to the warm location.
3rd Feed – Evening
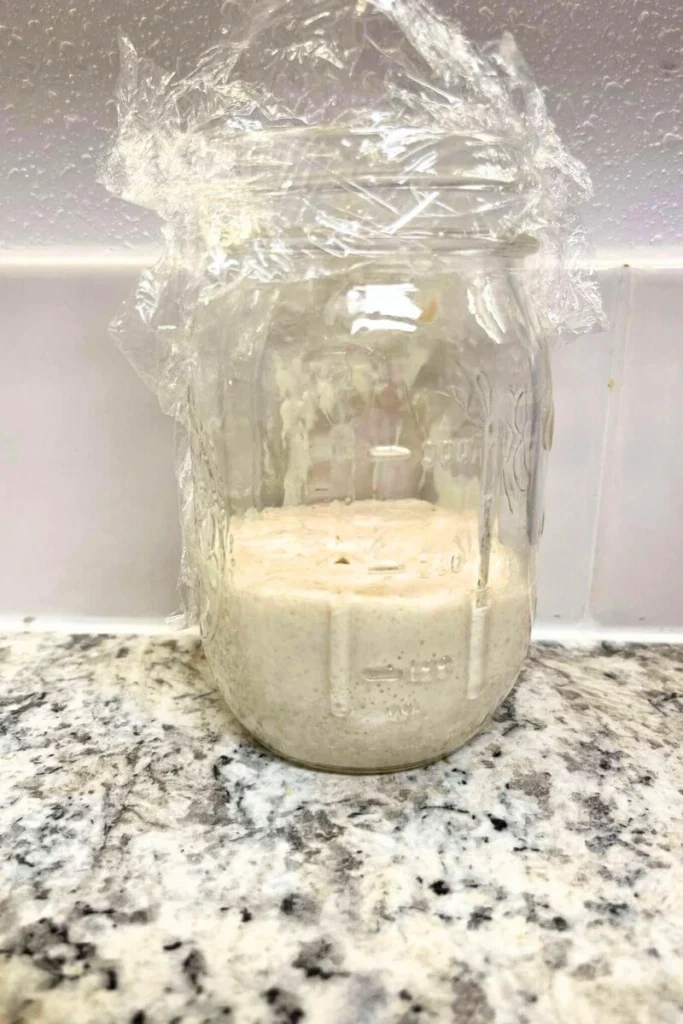
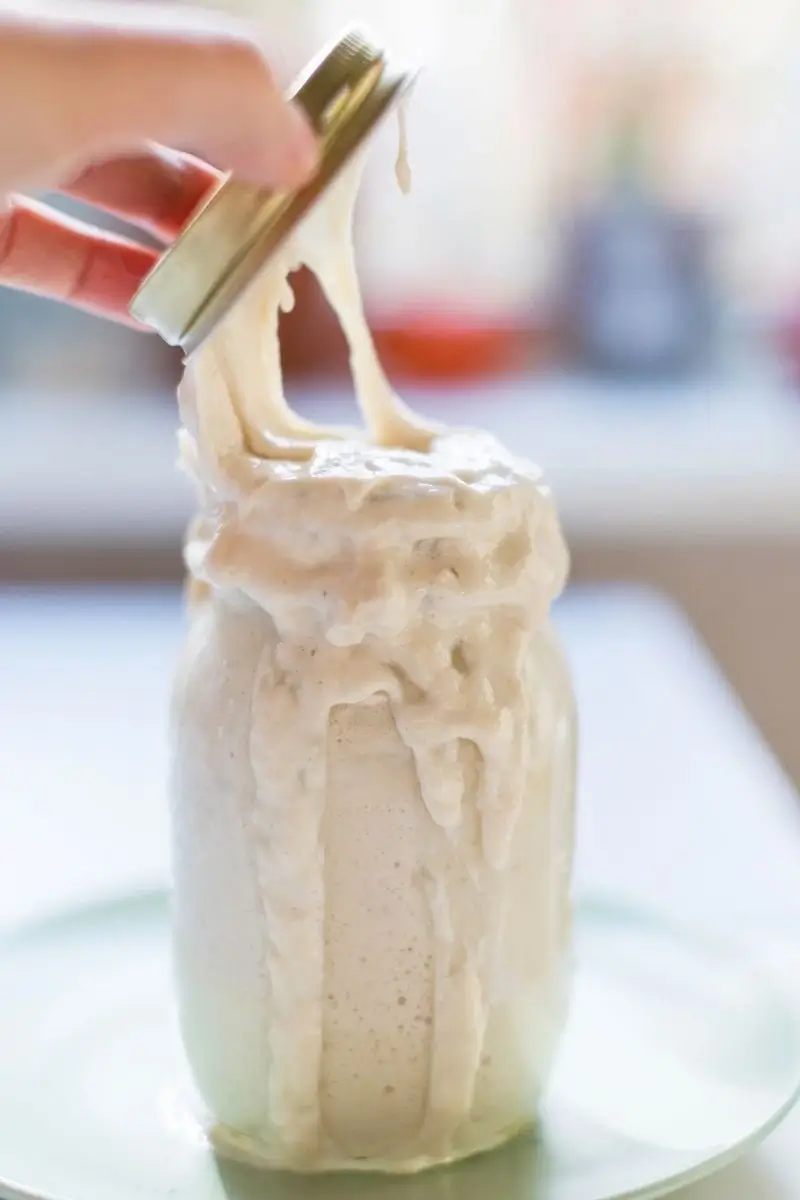
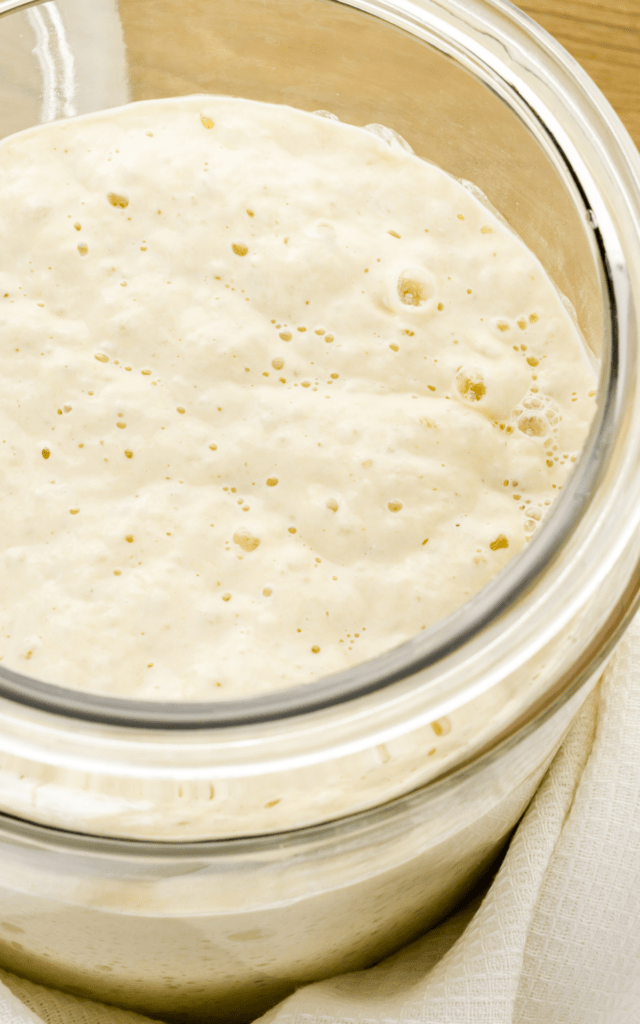
- 9 PM: By this stage, you should start seeing lots of signs of fermentation, such as bubbles forming, little bit of a rise, and a slightly sour smell.
- Add of 3 tablespoons of all-purpose flour.
- Pour in 3 tablespoons of water.
- Stir well to incorporate the new ingredients.
- Add the rest of the fermented mixture and mix well.
- Loosely cover the jar with plastic and return it to the warm location.
- Repeat the feeding process every 12 hours (morning, evening, morning, evening). Your starter should become active, bubbly, and have a pleasant sour aroma.
Note: If you notice a layer of liquid on top (called “hooch”), it’s a sign that your starter needs to be fed more frequently. Pour off the hooch before feeding.
4th Feed – Morning (36 hours)
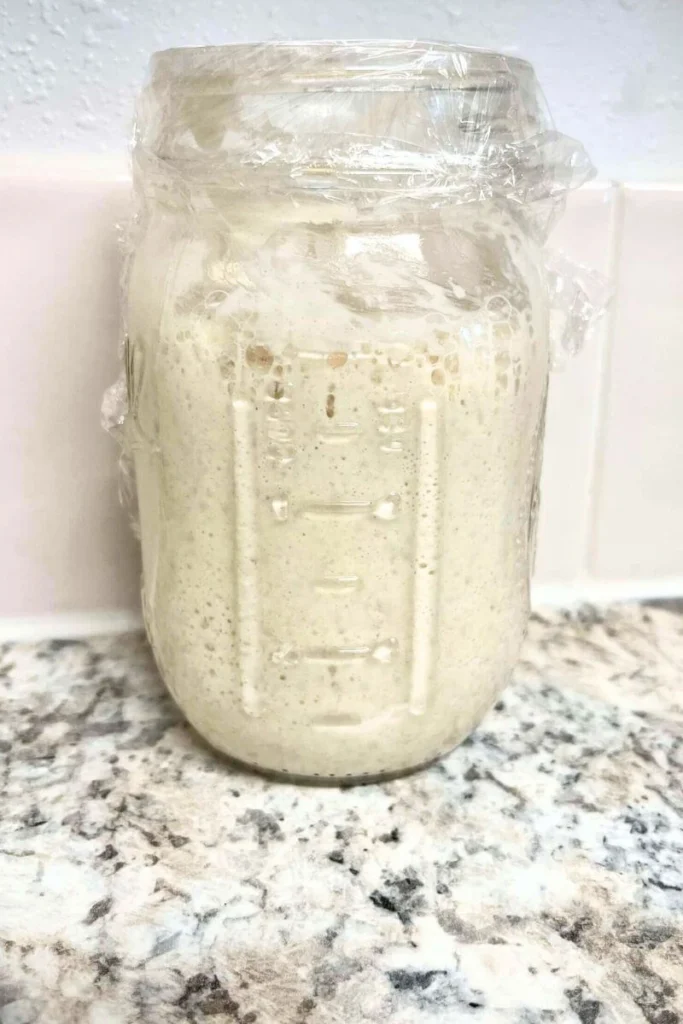
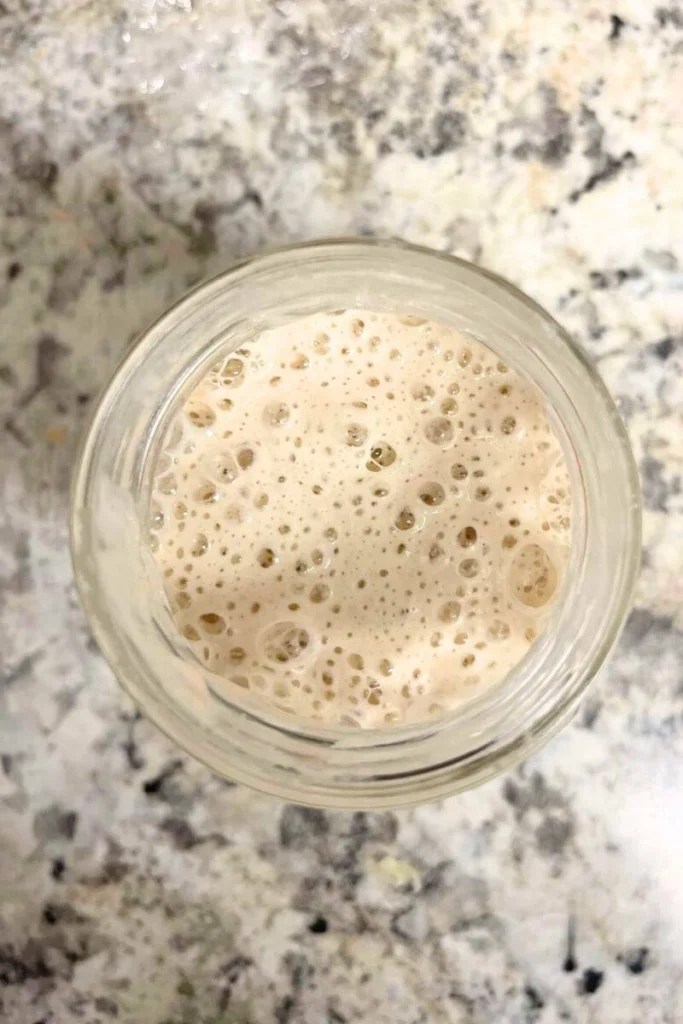
- 8 am: The sourdough starter should be very bubbly and have a full rise to the top of the jar. It has a very sour smell.
- Keep feeding it every 12 hours for about 3-5 days. (After day 3 and so forth, you might have some discard, but it’s a lot less waste and discard than the traditional way of growing your starter).
- After 1 week, the sourdough starter is ready to be used to make your first Easy No Knead Beginner Sourdough Bread.
5th Feed – Evening
- 9 PM: Discard half.
- Add of 3 tablespoons of all-purpose flour and no water (unless it’s really dry add 1 tbsp). It needs to be on the dryer/thicker side. Not runny, more like sour cream.
- Stir well to incorporate the new ingredients.
- Loosely cover the jar with plastic and return it to the warm location.
- Repeat the feeding process every 12 hours (morning, evening, morning, evening) for about a week 5-7 days. Your starter should become active, bubbly, and have a pleasant sour aroma.
How to Know Your Starter Is Ready
How to Maintain Your Sourdough Starter
Once your starter is active, you can keep it at room temperature with daily feedings or store it in the fridge and feed it weekly. If refrigerating, take it out a day before baking, feed it, and let it become bubbly before using.
- It’s important to maintain your starter by using 100 grams for a loaf of bread and then feeding it.
- If you are not planning to make sourdough bread in the next few days. Keep your starter in the fridge.
- Check this Sourdough Starter Maintenance blog post to keep your new sourdough starter maintained.
Frequently Asked Questions
1. Can I use different types of flour?
Yes! Whole wheat flour helps speed up fermentation, but you can also use rye, spelt, or unbleached all-purpose flour.
2. My starter isn’t bubbling—what should I do?
Keep it in a warm place and give it more time (just keep feeding it). If it’s still sluggish, try using whole wheat flour and filtered water.
3. Can I make this starter gluten-free?
Yes! Use brown rice flour or a gluten-free blend, but keep in mind that gluten-free starters may take longer to develop.
Start Your Sourdough Journey Today!
Making your own sourdough starter doesn’t have to be complicated. This simple 3-tablespoon method is beginner-friendly, low-waste, and gets you baking delicious homemade sourdough in no time. Give it a try, and soon you’ll be enjoying fresh, naturally leavened bread straight from your kitchen!
Have questions or need help troubleshooting your starter? Drop a comment below—I’d love to help!
Disclaimer: Remember, sourdough starters can vary in activity, so be patient and observe the progress. Once your starter is active, you can use it to bake delicious sourdough bread and other sourdough-based recipes.
If you try this 3 tbsp method for making sourdough starter, please leave a comment and tag me with your photos on IG @shakanranch

3 TBSP Method – Sourdough Starter Recipe
Materials
- 3 tablespoons 45 grams all-purpose flour or bread flour (I use King Arthur)
- 3 tablespoons water not every feed -keep reading
Instructions
First Feed – Evening
- 7 PM: In a clean bowl combine 3 tablespoons and 3 tablespoons of water.
- Mix well into a smooth, slightly thick mixture, consistency should be like sour cream.
- Place into the mason jar.
- Loosely cover the plastic wrap, allowing air to circulate but preventing any debris from entering.
- Place the jar in a warm location, ideally between 70°F to 85°F (21°C to 29°C). On your counter would work, on top of your fridge, or in your oven with the light on.
- Leave it overnight.
2nd Feed – Morning
- 8 am: Check the jar for any signs of activity. It’s normal if there aren’t any significant changes at this stage. I saw a little bit on bubble.
- In a clean bowl mix 3 tablespoons all-purpose flour and 3 tablespoons of water and the mixture from last night
- Stir the ingredients until well combined.
- Place everything back into the jar.
- Loosely cover the jar and return it to the warm location.
3rd Feed – Evening
- 9 PM: By this stage, you should start seeing lots of signs of fermentation, such as bubbles forming, little bit of a rise, and a slightly sour smell.
- Add of 3 tablespoons of all-purpose flour.
- Pour in 3 tablespoons of water.
- Stir well to incorporate the new ingredients.
- Add the rest of the fermented mixture and mix well.
- Loosely cover the jar with plastic and return it to the warm location.
- Repeat the feeding process every 12 hours (morning, evening, morning, evening). Your starter should become active, bubbly, and have a pleasant sour aroma.
Note: If you notice a layer of liquid on top (called “hooch”), it’s a sign that your starter needs to be fed more frequently. Pour off the hooch before feeding.
4th Feed – Morning (36 hours)
- 8 am: The sourdough starter should be very bubbly and have a full rise to the top of the jar. It has a very sour smell.
- Keep feeding it every 12 hours for about 3-5 days. (After day 3 and so forth, you might have some discard, but it’s a lot less waste and discard than the traditional way of growing your starter).
- After 1 week, the sourdough starter is ready to be used to make your first Easy No Knead Beginner Sourdough Bread.
5th Feed – Evening
- 9 PM: Discard half.
- Add of 3 tablespoons of all-purpose flour and no water (unless it’s really dry add 1 tbsp). It needs to be on the dryer/thicker side. Not runny, more like sour cream.
- Stir well to incorporate the new ingredients.
- Loosely cover the jar with plastic and return it to the warm location.
- Repeat the feeding process every 12 hours (morning, evening, morning, evening) for about a week 5-7 days. Your starter should become active, bubbly, and have a pleasant sour aroma.
Maintain
- * It’s important to maintain your starter by using 100 grams for a loaf of bread and then feeding it.
- * If you are not planning to make sourdough bread in the next few days. Keep your starter in the fridge.
- * Check this Sourdough Starter Maintenance blog post to keep your new sourdough starter maintained.
- You can store it in the refrigerator and feed it once a week, or you can leave it at room temperature and feed it daily if you plan to bake frequently.


Leave a Reply